
Controls
Touch controls for shooters: an Xbox Remote Play layout
Start with movement, looking and firing. Choose a separate index-finger button or Aim, which combines a held command with aiming, then adjust sensitivity.
On this page
For a shooter in Xbox Remote Play, place the on-screen sticks under your thumbs’ natural positions, then check whether you can move, turn the camera and fire at the same time. XBPlayer lets you change the position and size of touch controls and save layouts. Large buttons are easier to hit, but combining several actions also requires a comfortable grip.
Start with movement, looking and firing
On Android, iPhone or iPad, connect to your console through XBPlayer and launch a familiar shooter. Choose training, an empty area or another quiet section. If you already have a working layout, save a copy before making changes. General setup is covered in the touch controls guide.
Check the current control scheme in the game: which Xbox buttons handle fire, aiming, jump, reload and interact. Then find the corresponding on-screen controls. The left stick usually handles movement and the right stick looking, but bindings depend on the game and selected scheme.
Move forward while turning the camera, then add a shot. If firing requires you to stop looking, choose one of the two options below: a separate button for an additional finger, or an Aim zone that combines holding a command with stick movement.
Arrange buttons around a comfortable grip
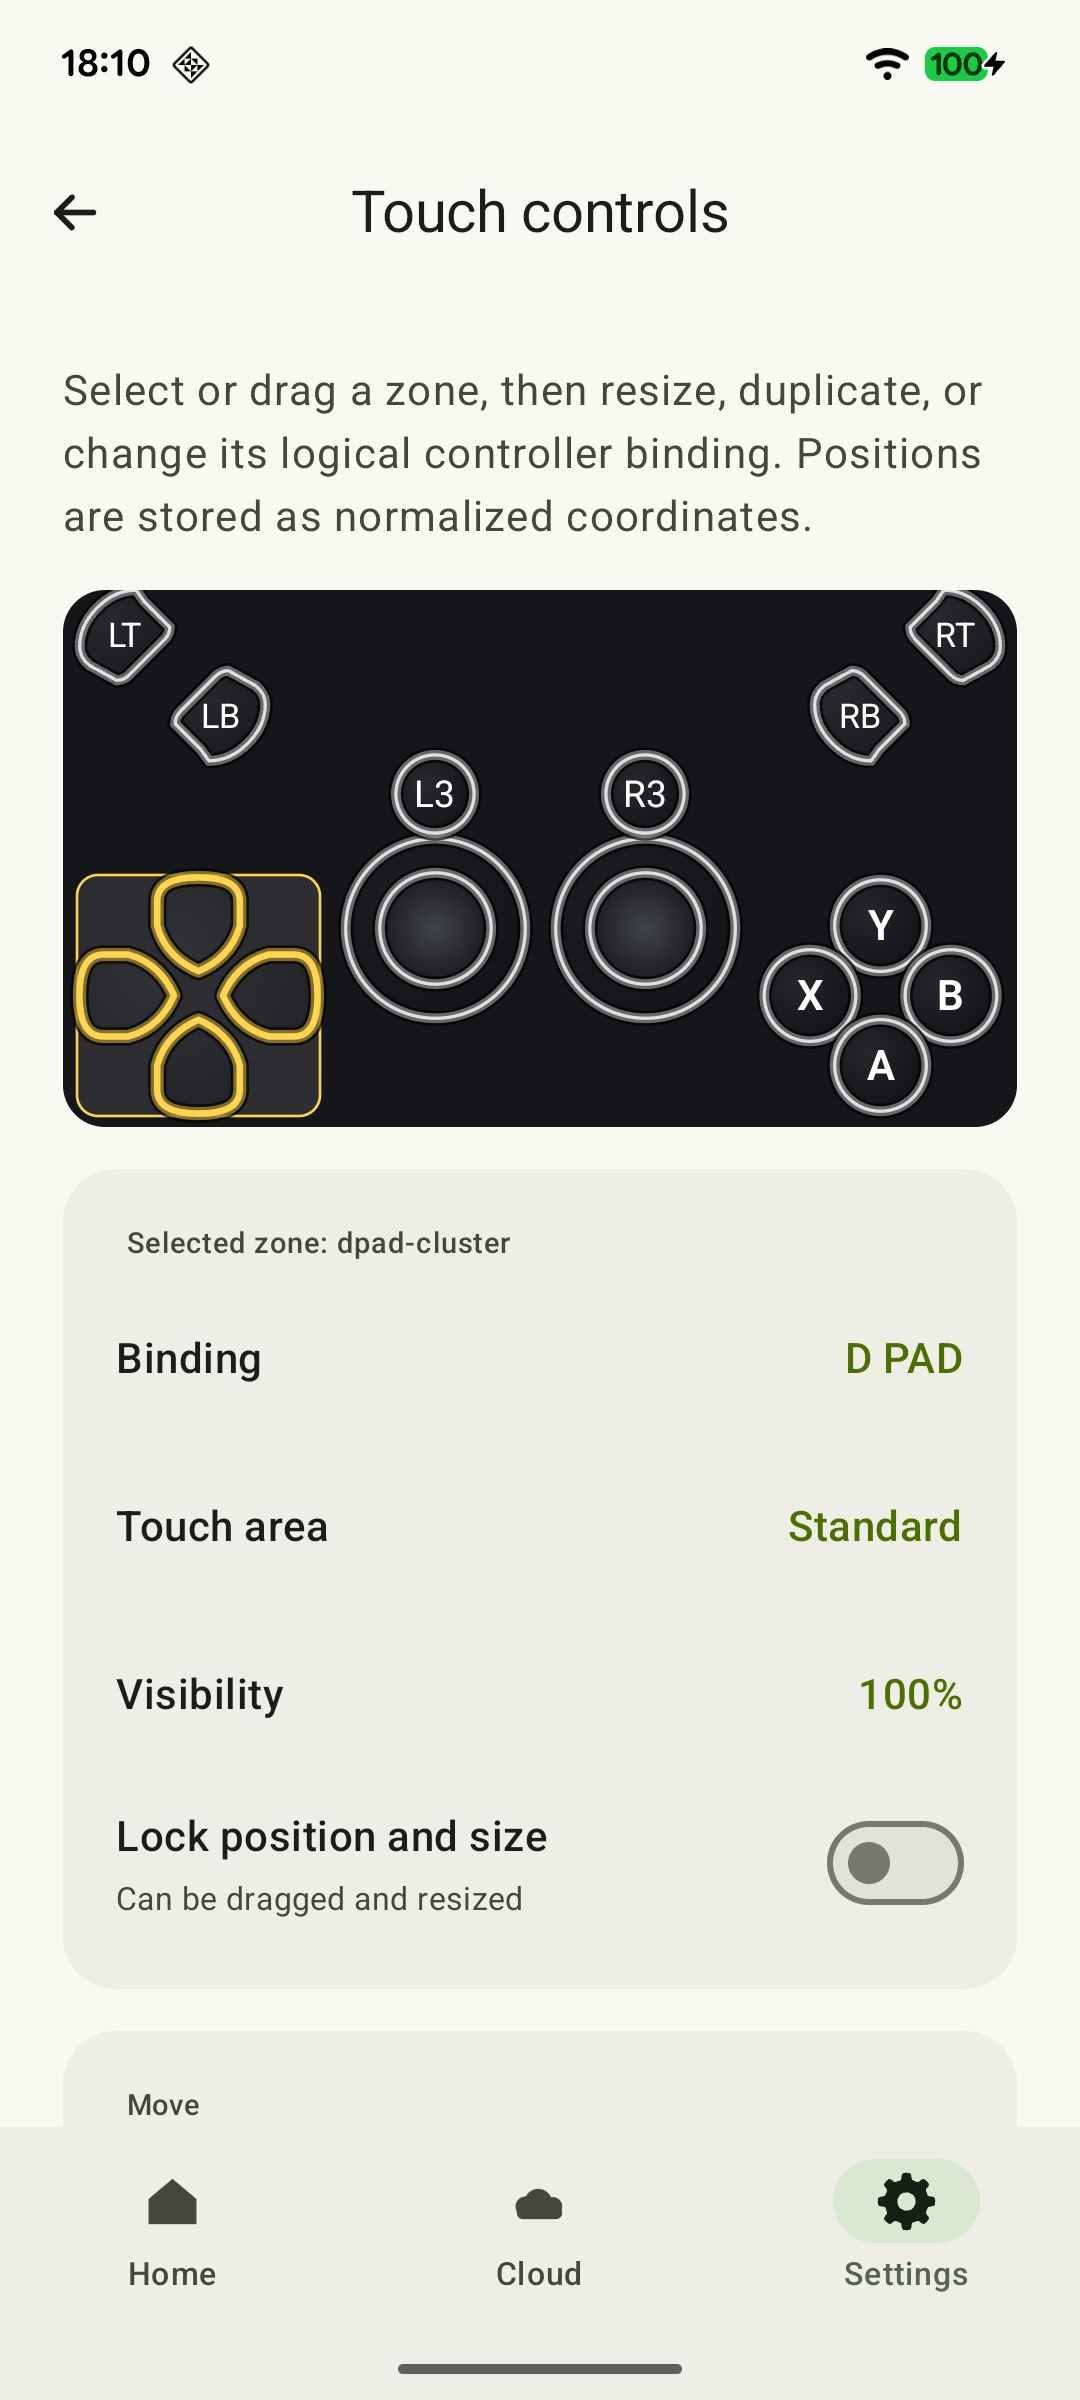
Hold the device horizontally as you will while playing. Rest your thumbs on the screen without stretching your hands: these points are your initial stick centers. Do not aim for equal margins or symmetry. Leave room between a stick’s working area and the next button so your finger does not hit another control when turning.
 Enlarge screenshot
- Keep the center of the picture clear for the crosshair and target.
- Put fire and aim where your finger returns without changing your grip.
- Place reload and interact nearby, then check how easily you can return to looking after pressing them.
- Keep buttons clear of the minimap, ammunition count and character status.
If you can comfortably touch the top of the screen with an index finger, try moving fire or aim there. The device should remain stable. Do not force a grip that quickly tires your hands just to fit a layout. For accidental presses, increase the space between controls first; making buttons smaller can make them harder to hit.
Two starting layouts: separate fire or Aim
Set up one of these layouts manually in the editor. Start with a landscape window and adjust distances for your screen and hands. The examples bind fire to RT and aiming to LT; replace the bindings if your game uses another scheme.
| Area | Separate fire button | Aim for firing while aiming |
|---|---|---|
| Bottom left | Left stick under the thumb: movement. | Left stick under the thumb: movement. |
| Bottom right | Right stick under the thumb: looking. | Aim under the thumb: “Held control” RT, “Aim stick” right. Touching fires; moving the finger aims. |
| Top right | RT under the index finger, only with a stable grip. | A normal right stick in a separate reachable area for looking without firing. Do not overlap it with Aim. |
| Near the right working area | LT, reload and interact, spaced away from the stick. | LT, reload and interact, spaced away from Aim. |
| Center and menus | Keep the crosshair clear; put pause outside active finger movement but within reach. | The same requirements for visibility and pause access. |
You can choose LT instead of RT for Aim: the finger then holds the aim command while aiming, and fire remains a separate action. Choose according to the game. Aim does not choose a target or aim for you; touching the zone immediately activates the selected command. If that is unwanted, use a normal right stick. Additional combat combinations may still require another finger or a different layout.
Clear the view while keeping the buttons you need
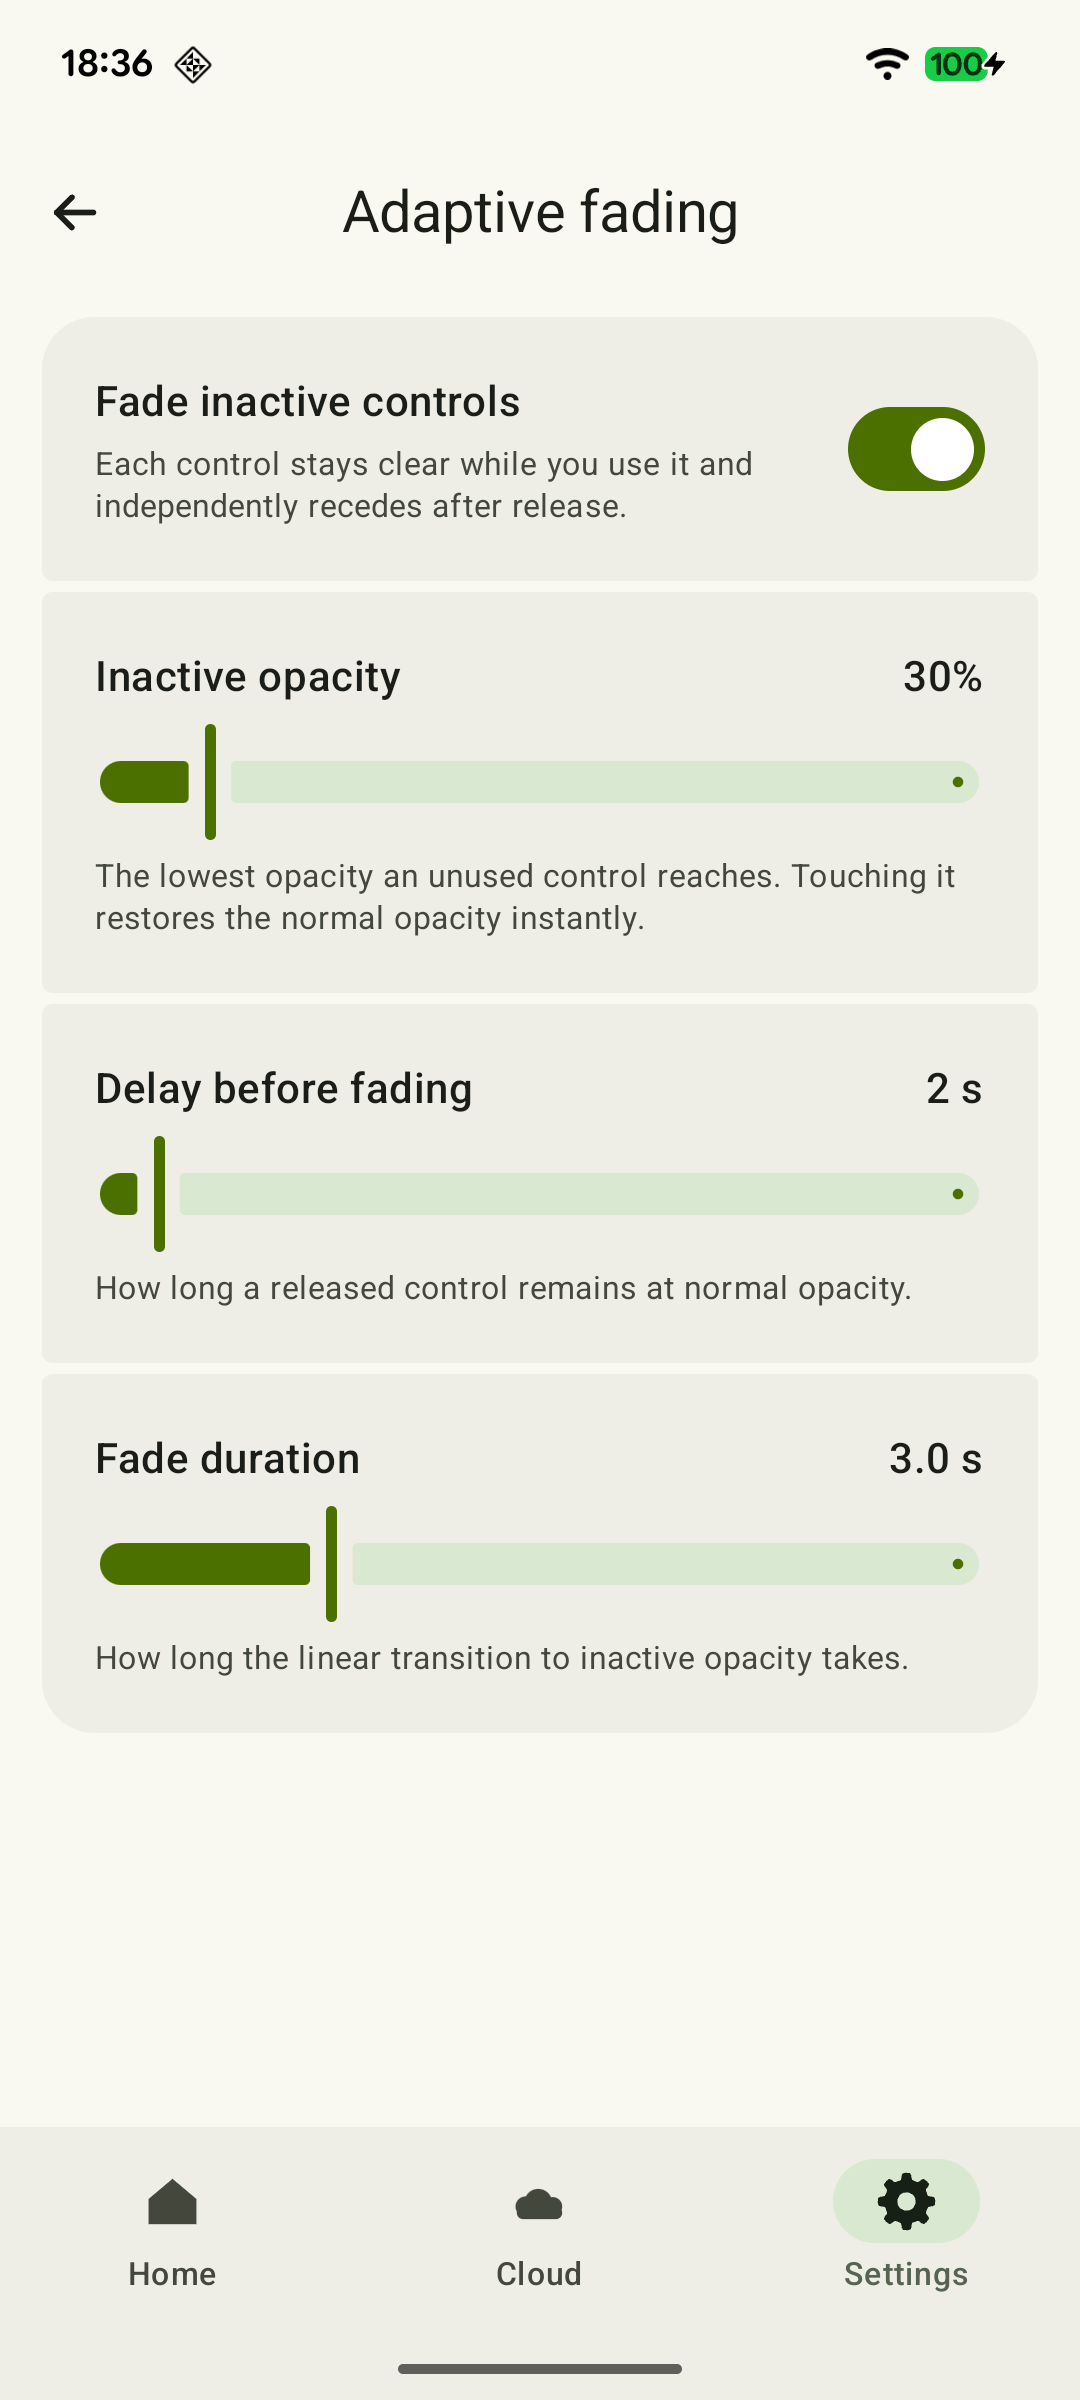
To see the game better, increase an obstructing control’s transparency or use adaptive fading. Even an invisible button may still accept touches: transparency does not disable it. If you do not need a control at all in this layout, remove it from the saved copy. Consider inventory and game menus as well as combat. After changing it, check finger movements near that area again.
 Enlarge screenshot
Separate layout, sensitivity and holding behavior
XBPlayer’s touch-stick and Aim properties include “Stick sensitivity” and “Stick deadzone”; Aim also supports vertical aim inversion. Sensitivity changes how the zone responds to finger movement, while the deadzone leaves a small area without a command. In-game camera sensitivity, inversion and aim assist form the next, separate layer. A touch zone sends stick commands and does not become a mouse.
If your finger reliably lands in the intended zone but the camera responds too sharply, first reduce the zone’s sensitivity slightly in XBPlayer and repeat the same aiming movement. If small movements disappear, check the deadzone. Do not change zone and game sensitivity together, or the result will be hard to interpret. For accidental neighboring presses, adjust placement rather than sensitivity. For fine corrections, you can separately try gyroscope aiming; for a physical controller, see the remapping guide.
For long aiming holds, check whether the game offers toggle aim. XBPlayer also supports latching for supported individual buttons and triggers: the first touch leaves the press active after you lift your finger, and a second touch releases it. This is a separate mechanism, so test only one option at first in training. Latching does not apply to sticks or groups of controls and does not generate repeated presses.
Test the layout with four exercises
Complete the four exercises in the list below in one quiet scene. If something goes wrong, identify it precisely: your finger could not reach, covered the target, hit a neighboring zone or lost the stick. Change one control and repeat the affected exercise. Save a successful setup in the library with the game and grip in its name.
Check the selected name in your next session. XBPlayer remembers separate selections for landscape and portrait windows; manually select the appropriate saved layout when you switch games or change your grip.
Four layout test outcomes
After setup, complete the exercises in a quiet scene. Tick an item when the required combination succeeds several times without an accidental neighboring press.
Movement and looking work together
Walk in an arc around a stationary object while keeping it in the center of the screen. Your fingers should not lose the sticks or require a grip change.
Xbox touch controls in XBPlayer: buttons, layouts and transfers →Aiming and a single shot are repeatable
Aim at two targets in turn and fire one shot at each. Separately check that the button does not cover the target or activate a neighboring control.
The required combat actions work together
Combine movement, aiming and firing. With Aim, check that releasing the zone ends the selected hold and that a normal right stick lets you look without it. For a separate latched button, check release with a second touch.
Bluetooth or USB for Xbox Remote Play: which to choose →You can return to looking after other actions
Reload, change weapons, open pause and return to the game. Check a stable grip and access to both sticks.
If a problem occurs, change one control and repeat the exercise. Save a successful layout; manually choose the saved layout for the game and grip, while XBPlayer remembers separate choices for the two window orientations.
When to try a controller
If the game constantly needs several simultaneous actions but your comfortable grip leaves only two fingers available, a physical controller may be more practical. Compare Bluetooth and USB controller connections and repeat the same exercises if you already have a compatible controller. Focus on accuracy, a stable grip and comfort during longer play.
Sources and further reading
- XBPlayer — Xbox Remote Play and cloud gaming — Touch controls on phones and tablets, control position and size, and separate physical-controller settings.
- Touch controls: make them your own — Official touch-zone guide: a layout copy, transparency, removal and latching of individual buttons.
Get the key points
Open a summary request with this article’s link. For Gemini, the request is copied — paste it into the chat.